Angular에서 ViewChildren, ContentChildren, 그리고 QueryList 이해하기
부모 Component에서 자녀에게 액세스 해야하는 경우가 있습니다. Angular로 어떻게 처리 할 수 있는지 보도록 하겠습니다.
ViewChildren
View DOM에서 지정된 Component 또는 Directive를 QueryList로 반환합니다.
예를 들어 간단한 alert Component를 작성해 보겠습니다.
|
|
이제 우리의 app Component에서 이 Component를 여러번 사용하고 @ViewChildren 데코레이터를 사용합시다.
|
|
우리는 @ViewChildren 데코레이터를 사용하여 호스트 뷰에서 요소를 가져올 수 있습니다.
@ViewChildren 데코레이터는 파라미터 타입으로 Component / Directive 타입 또는 템플릿 변수 이름을 지원합니다.
파라미터가 Component / Directive 일 경우 반환 값은 Component / Directive의 인스턴스가 됩니다.

파라미터가 템플릿 변수 이름인 경우 반환 값은 Native Element에 대한 참조가 됩니다.
|
|
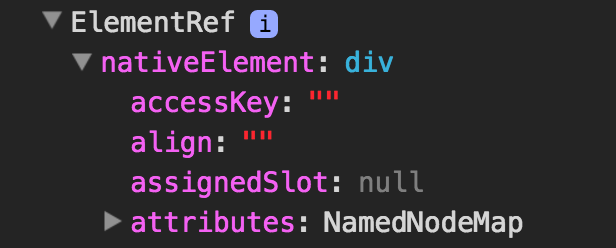
참고: 이 경우 하나의 요소이므로
@ViewChild데코레이터를 사용하는 것이 더 좋습니다.
read 파라미터
기본적으로 @ViewChildren 데코레이터는 Component 인스턴스를 반환하지만 다른 토큰을 요청할 수 있습니다.
native DOM Element
1(AlertComponent, { read: ElementRef }) alerts: QueryList<AlertComponent>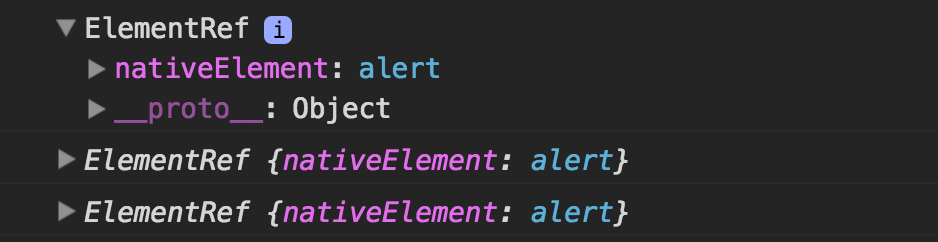
ViewContainerRef - 템플릿이나 Component를 동적으로 만들어야 할 때 이 토큰이 필요합니다.
1(AlertComponent, { read: ViewContainerRef }) alerts: QueryList<AlertComponent>
QueryList
@ViewChildren의 반환 타입은 QueryList입니다. QueryList는 항목 목록을 저장하는 객체의 이름입니다. 이 객체의 특별한 점은 응용 프로그램의 상태가 변경되면 Angular가 자동으로 객체 항목을 업데이트한다는 것입니다.
QueryList는 Iterable 인터페이스를 구현하므로 ngFor Directive를 사용하여 Angular 템플릿에서 사용할 수 있습니다.
QueryList API
Getter
- first - 첫 번째 항목 가져 오기
- last - 마지막 항목 가져 오기
- length - 아이템 길이를 얻는다.
Method
map(), filter() , find(), reduce(), forEach(), some()
toArray()- JavaScript 배열로 항목을 반환합니다.- changes () - 값의 변경을 changes Observable을 구독 (subscribe)하여 인지할 수 있습니다. 하위 요소가 추가, 제거 또는 이동될 때마다 쿼리 목록이 업데이트되고 쿼리 목록의 changes Observable이 새로운 값을 emit 합니다.
기억하세요
QueryList는 ngAfterViewInit 라이프 사이클 훅 전에만 초기화되며, 따라서 이 시점에만 사용할 수 있습니다.
@ViewChildren vs @ContentChildren
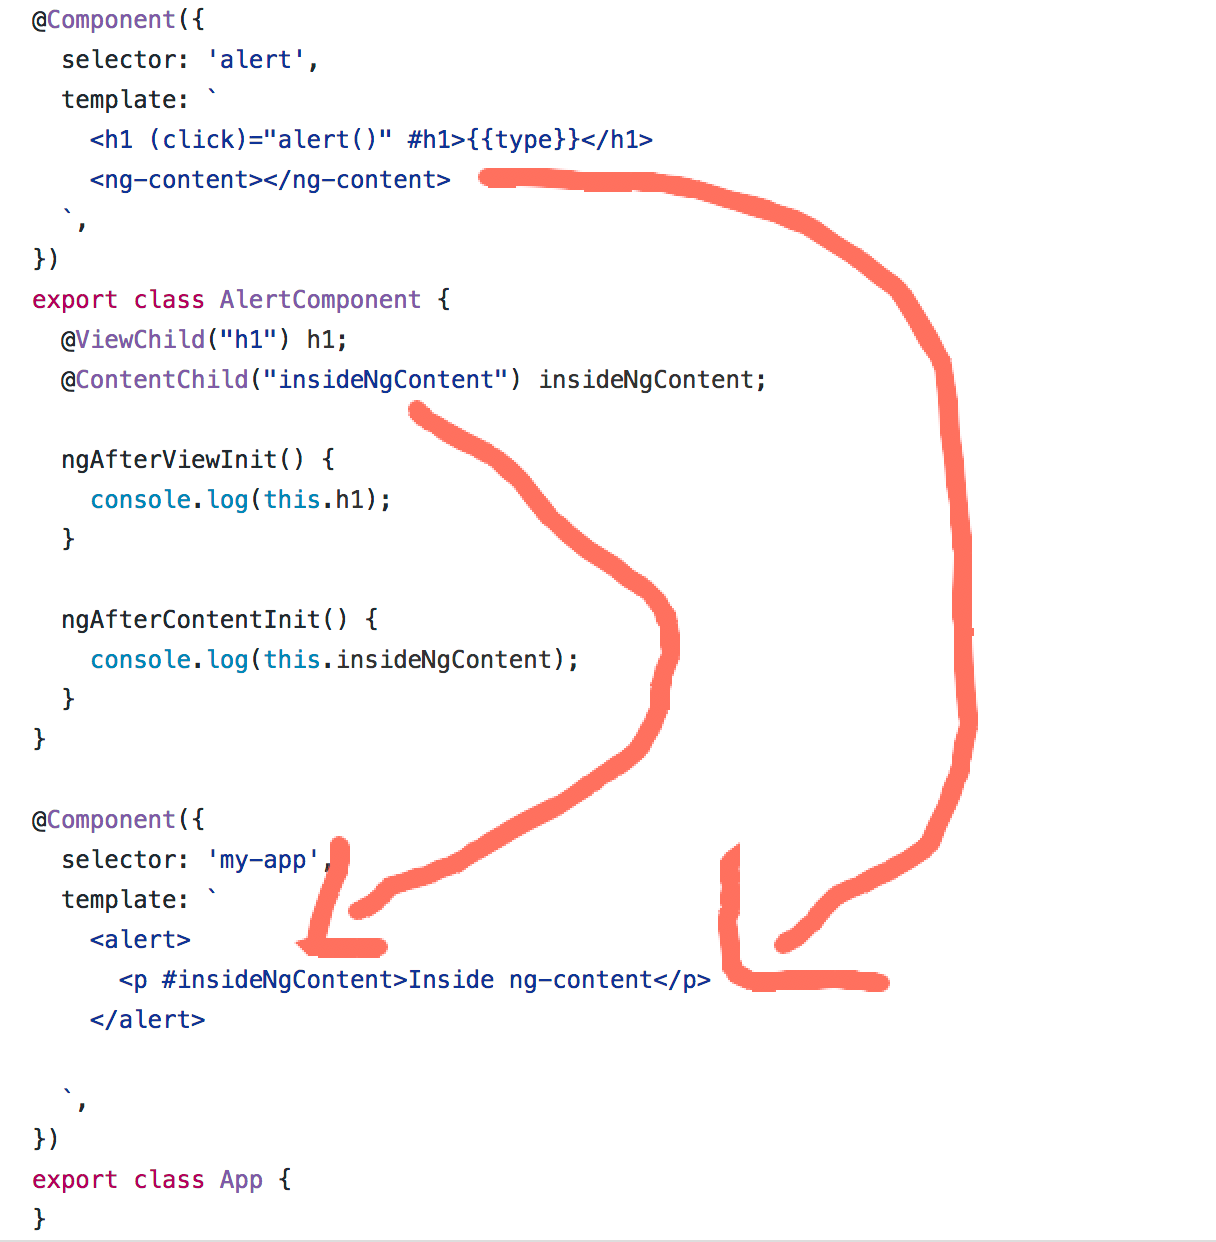
@ViewChildren은 ng-content 태그 내에 존재하는 요소를 포함하지 않습니다.
@ContentChildren은 ng-content 태그 내에 존재하는 요소만 포함됩니다.
@ContentChildren
Content DOM에서 지정된 요소 또는 Directive를 QueryList로 반환합니다.
|
|
기억하세요
QueryList는 ngAfterContentInit 라이프 사이클 훅 전에만 초기화되며, 따라서 이 시점에서만 사용할 수 있습니다.
이 내용은 나중에 참고하기 위해 제가 공부하며 정리한 내용입니다.
의역, 오역, 직역이 있을 수 있음을 알려드립니다.
This post is a translation of this original article [https://netbasal.com/understanding-viewchildren-contentchildren-and-querylist-in-angular-896b0c689f6e]
참고
- Angular 튜토리얼 - 소개
- Angular 튜터리얼 - Hero 에디터
- Angular 튜터리얼 - Master/Detail
- Angular 튜터리얼 - 다중 콤포넌트
- Angular 튜터리얼 - 서비스
- Angular 튜터리얼 - 라우팅
- Angular 튜터리얼 - HTTP
- Angular HttpClient
- Angular Webpack 설정
- Angular에서 간단하게 번역기능 구현하기
- Angular 동적 컴포넌트 로딩
- Angular에서 동적 컨텐츠 생성
- Angular에서 ViewChildren, ContentChildren, 그리고 QueryList 이해하기